Justin Shield
coder, gamer, parent
3D Printers: Buying Vs Building
In: 3D Printing
18 Sep 2015I’ve owned a 3D printer for about 2 years now, and I can say it’s one of the best nerd gifts that I’ve ever given myself. I’ve made dozens of things on it, some useful most of them not so useful, some of them downright fun. I chose to build my 3D printer from a Kit as opposed to buying a premade one.
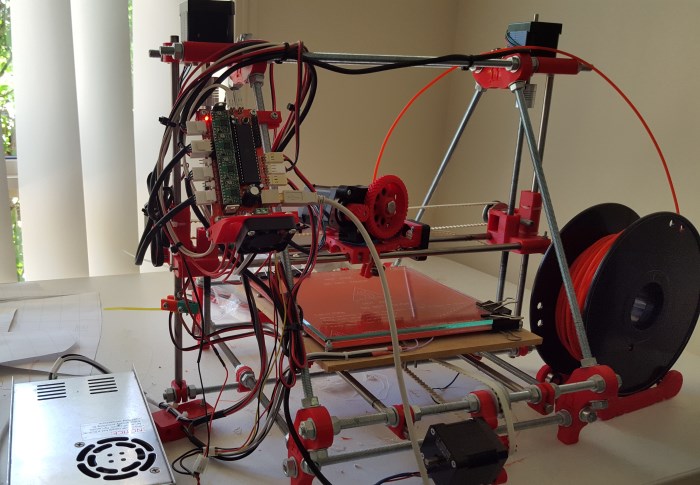
The primary reason that I chose to build vs buy were pretty clear 2 years ago, the cost and availability in Australia were prohibitively expensive to buy a commercial desktop 3D printer. Today however prices have come down to less than what I purchased my kit 2 years ago, so price is no longer the deciding factor.
Today the deciding factor for me has changed to:
Do you want to build, tinker, increase your knowledge / Do you just want to use it like an appliance?
There’s no right answer here really, it’s up to the individual on what they intend to get out of owning a 3D Printer.
Building
Pros:
- Cheaper than most professional grade desktop 3D printers
- If something breaks (and it will), you know how to fix it (after all you built it).
- Huge community of support and improvements for custom 3D printers
- Not locked into manufacturers filaments or Digital Rights Management
- Custom filaments – including wood grain, carbon fiber, translucent plastics
- Free open source software to Make, Slice and Control your printer
Cons:
- Calibration is extremely difficult, time consuming and error prone. (Big CON)
- Every time you change filament, you need to re-calibrate your extruder.
Buying
Pros:
- Calibrated from the factory (BIG PRO)
- Extruders are generally made from aluminium so can avoid melting
- Cases are generally very high quality and includes enclosures so you don’t breath in any fumes from the printing process (if you go ABS)
- In General based from newer iterations of the reprap printers which avoids harmonic resonance and so can print faster
Cons:
- More expensive than building or buying from a Kit
- Locked into the manufacturers software
- Locked into the manufacturers filament (can be more expensive than custom filament)
My Recommendation
If I were to do it over again today, I would probably still build (an i3 vs an i2 model Reprap Prusa), however to my friends and people I meet who are not hackers and tinkerers I highly recommend buying a desktop 3D printer. For similar price to buying a kit, you get a well tuned, calibrated desktop printer where you can plug it in and get reliable high quality prints day after day.
Just be aware that different commercial printers can have a small build volume. Price & build volume should be key indicators for choosing your next desktop printer.
Building from a Kit
Mendel Prusa i1.5 kit by Emblem Robotics ($550)
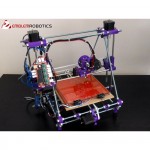
Maximum build volume: 20 x 20 x 12cm (good build volume)
Software: Free open source software available
Commercial Desktop 3D Printers
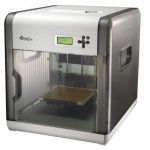
Davinci 1.0 by XYZ Printing ($500)
Maximum build volume: 20 x 20 x 20 (good build volume).
Software: Supplied
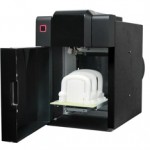
Up Mini ($899)
Maximum build volume: 12 x 12 x 12cm
Software: Purchased separately
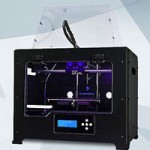
FlashForge Creator Pro ($1535)
Maximum build volume: 22.5 x 14.5 x 15.0cm (good build volume).
Software: Purchased separately
Makerbot Replicator 5th Gen ($5100)
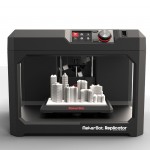
Maximum build volume: 25.2 x 19.9 x 15cm
Software: Free Supplied by Manufacturer
You might be thinking, wow the Makerbot Replicator is so much more expensive than the rest. Makerbot is one of the original companies behind the desktop 3D printer industries we have today with their cupcake CNC (no longer available). Their software and printers are one of the best in the industry with years of improvements behind them. If you want a reliable printer with huge support and high quality filaments, wifi management, etc then the $5100 price tag is understandable.
For beginners who are looking for a Sub $1000 desktop 3D printer, I highly recommend the Davinci for $500. It’s got good quality prints and a great build volume for printing out large parts for your next project.
However if you’re a hacker, tinkerer or builder, I highly recommend that you build one from a kit or source the parts yourself. The experience that you get by interfacing all of the different components and building will make you a better builder with a more in-depth understanding of mechanical engineering, physics behind fused filament extrusion and many more things. I’ll be expanding on what I’ve learned in future posts. So keep your eyes peeled for more information.
- Tags: 3D Printer, Review
Comment Form
About Justin

Justin is a Senior Software Engineer living in Brisbane. A Polyglot Developer proficient in multiple programming languages including [C#, C/C++, Java, Android, Ruby..]. He's currently taking an active interest in Teaching Kids to Code, Functional Programming, Robotics, 3D Printers, RC Quad-Copters and Augmented Reality.
About This Blog
Software Engineering is an art form, a tricky art form that takes as much raw talent as it does technical know how. I'll be posting articles on professional tips and tricks, dos and donts, and tutorials.
Photostream
Categories
- 3D Printing (2)
- Automated Deployment (1)
- Blogging (2)
- C# (10)
- CMS (1)
- Conference (1)
- DIY (2)
- Education (1)
- Essays (4)
- Functional Programming (6)
- Haskell (4)
- IIS (1)
- Inversion Of Control (1)
- Javascript (1)
- Kids (1)
- Mobile (2)
- Mono (2)
- NAnt (2)
- Reflection (1)
- Security (1)
- Ubuntu (2)
- Umbraco (1)
- Unit Testing (1)
- Virtual Reality (1)
- Windows Phone 7 (1)
- What I look for in a senior software engineer Justin Shield: […] I’m not going to list the design patterns that you’ll need, I’ve already [...]
- Justin: Hi Ross, I do actually like Umbraco, it provides some nice abilities for creating websites that I [...]
- Justin: Hi GordonBGood, Thanks for taking the time in replying. You're absolutely correct, it is turners s [...]
- Ross Gallagher: Hi Justin, I'm a fellow Aussi looking to use Umbraco to create a simple website. I have downloaded [...]
- GordonBGood: This is the "Turner Sieve" which **IS NOT** the Sieve of Eratosthenes (SoE) neither by algorithm nor [...]
- What I look for in a senior software engineer
- Why you should keep your own technical blog
- Leading Developers and Getting Things Done!
- Optimizing Long Running Processes with EF6 – Postmortem
- Free SSL Certificates from LetsEncrypt
- Teaching kids to code
- DIY Virtual Reality – In your pocket
- 3D Printers: Buying Vs Building
- Cross-Platform Mobile Development: PhoneGap vs Xamarin
- HOWTO: Using Umbraco CMS for multi-site solutions
